Fall 2023. FFMEG is still the absolute reigning king when it comes to processing digital video and digital media.
Don’t expect a fancy GUI, contextual menus or drag and drop compatibility. It’s all command line. This binary/application runs on just about everything and does just about anything with digital video and media in a binary that’s less than 20mb.
Here’s some useful commands and links for exporig FFMPEG further..
List the relevant info on video/media
ffmpeg -i file.mp4 -hide_banner -f null /dev/null
Extract all frames as a PNG
ffmpeg -i input.mp4 %04d.png
Extract a frame for every second
ffmpeg -i VIDEO-NAME .mov -r 1 VIDEO-NAME_%02d.png
View this post on Instagram
Extrac at a given time.
ffmpeg -ss 00:00:04 -i input.mp4 %04d.png
Extract a given length starting at :04 for “-t 2” (2 seconds) to :06.
ffmpeg -ss 00:00:04 -t 2 -i input.mp4 %04d.png
Make a 512×512 frame for each second of video
ffmpeg -i VIDEO-NAME.mov -s 512x512 -r 1 VIDEO-NAME-512x512-%02d.jpg
Note this rencodes first using the -vf fp1=1 flags
ffmpeg -i VIDEO-NAME.mov -s 512x512 -vf fps=1 VIDEO-NAME-512x512-%02d.jpg
More on using FFMPEG to extract still frames from video files.
https://www.bannerbear.com/blog/how-to-extract-images-from-a-video-using-ffmpeg/
Scaling videos in FFMPEG
ffmpeg -i input.mp4 -vf scale=640:-1 %04d.png
The command above sets the width to 640 pixels. The height of the output images will be calculated automatically according to the aspect ratio of the input video. The command first scales the width to 640 and -1 contrains to appropriate size to keep the same ratio
More on cropping and scaling videos using FFMPEG
https://video.stackexchange.com/questions/4563/how-can-i-crop-a-video-with-ffmpeg
https://www.bannerbear.com/blog/how-to-crop-resize-a-video-using-ffmpeg/
Converting images to video in FFMPEG
A series of images that are sequentially named, e.g. slide-01.jpg, slide-02.jpg, slide-03.jpg, slide-04.jpg, etc. can use ffmpeg to create a video.
ffmpeg -framerate 1 -i slide-%d.jpg -c:v libx264 -r 30 output.mp4
The above command takes an input of images, -i slide-%d.jpg. This will search for the image with the lowest digit and sets that as the starting image. It will then increment that number by one and if the image exists, it will be added to the sequence. A start image can be specified with -start_number n, If -start_number 3 is used inabove command, the starting image would be slide-03.jpg.
Options are always written before the file they refer to, so the example, -framerate 1 -i are options used for the input image and -c:v libx264 -r 30 are options for the output file.
Use -framerate 1 to define how fast the pictures are read in, in this case, 1 picture per second. Omitting the framerate will default to a framerate of 25.
-r 30 is the framerate of the output video. Again, if not define FFMPEG would default to 25.
Add -vf format=yuv420p or -pix_fmt yuv420p (when your output is H.264) to increase the compatibility of the video with a wide range of MPEG 4 players:
ffmpeg -framerate 1 -i slide-%d.jpg -c:v libx264 -r 30 -pix_fmt yuv420p output.mp4
The -c:v libx264 specifies the codec to use to encode the video. x264 is a library used for encoding video streams into the H.264/MPEG-4 AVC compression format.
Using a glob pattern.
The glob pattern *.jpg used below will select all files with names ending in .jpg from the current directory. The matching files will be sorted according to LC_COLLATE. This is useful for images named sequentially, but not necessarily in numerical sequential order.
ffmpeg -framerate 1 -pattern_type glob -i '*.jpg' -c:v libx264 -r 30 -pix_fmt yuv420p output.mp4
FFMPEG PIPING
How to use unix cat to pipe to ffmpeg:
cat *.jpg | ffmpeg -framerate 1 -f image2pipe -i - -c:v libx264 -r 30 -pix_fmt yuv420p output.mp4
Using the FFMPEG concat demuxer.
The concat demuxer to will read in still images listed in a text file. Below, is a fictional text document titled slides.txt, it has a list of images for a slideshow like video. The order and duration (2 seconds) is set for each still image in the output video.
#slides.txt
file ‘slide-01.jpg’
duration 2
file ‘slide-02.jpg’
duration 2
file ‘slide-03.jpg’
duration 2
file ‘slide-04.jpg’
duration 2
file ‘slide-05.jpg’
duration 2
file ‘slide-06.jpg’
duration 2
The following command usess the text file titled “slides.txt” to output a video slideshow of the images:
ffmpeg -f concat -i slides.txt -c:v libx264 -r 30 -pix_fmt yuv420p output.mp4
More on creating slideshow and using still images in FFMPEG:
https://shotstack.io/learn/use-ffmpeg-to-convert-images-to-video/
Splitting Long videos in to smaller segments
Videos are limited to 59 seconds & 50mb for Bluesky or X regular accounts
Here’s how to split a long video into 59 sec segments using an FFMPEG command:
ffmpeg -i bars-n-tone.mp4 -acodec copy -f segment -segment_time 59 -vcodec copy -reset_timestamps 1 -map 0 bars-n-tone-%d.mp4
Example:
Merginng videos in FFMPEG
Merge a list of videos with FFmpeg using concat demuxer
To merge videos using the concat demuxer, first create a text file with a list of videos you want to join. Below is an example file videos.txt. You can add comments to the file, they will be ignored by the demuxer.
#videos.txt
file ‘input1.mp4’
file ‘input2.mp4’
file ‘input3.mp4’
In the following command, the videos listed in the text file will be merged according to the order they are listed.
ffmpeg -f concat -i videos.txt -c copy output8.mp4
Merge all videos in a directory with FFmpeg using concat demuxer.
A bunch of videos in a directory can be joined together. To determine the order name the video files alphabetically or numerically. They will be listed according to LC_COLLATE.
for f in *.mp4; do echo "file '$f'" >> videos.txt; done
The above will create a file videos.txt with a list of files with the extension .mp4. The command below will join them together into a single video:
ffmpeg -f concat -i videos.txt -c copy output9.mp4
Merge videos with the concat protocol.
Videos can be merged with the concat protocol. The following code stitches four videos without re-encoding them.
ffmpeg -i "concat:input1.mp4|input2.mp4|input3.mp4|input4.mp4" -c copy output10.mp4
More on merging in FFMPEG:
https://shotstack.io/learn/use-ffmpeg-to-concatenate-video/
FFMPEG Device Capture (SCREEN CAPTURE in OS X)
List the available devices to capture video and audio from. Windows and Unix Operating systems will have entirely different devices and methods to capture them
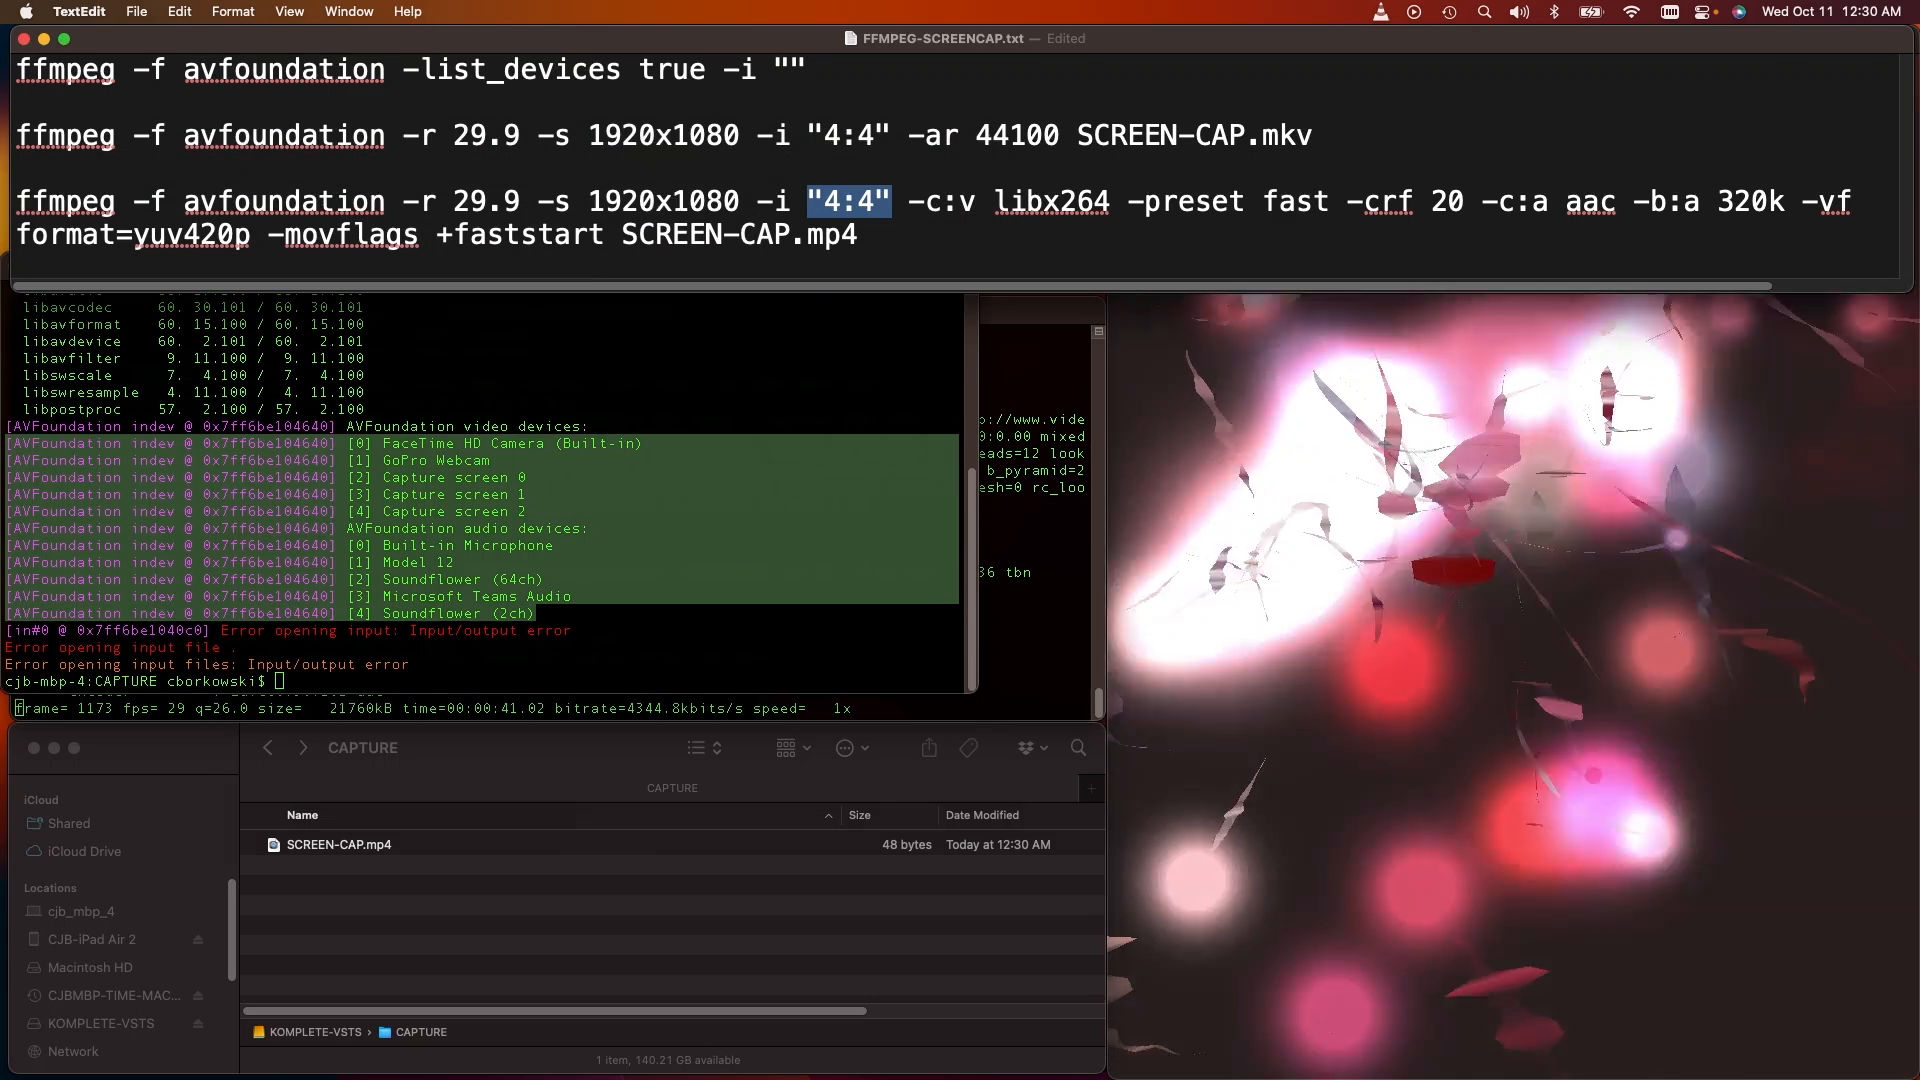
ffmpeg -f avfoundation -list_devices true -i ""
Typical output:
[AVFoundation indev @ 0x7fb4ceb04640] AVFoundation video devices:
[AVFoundation indev @ 0x7fb4ceb04640] [0] FaceTime HD Camera (Built-in)
[AVFoundation indev @ 0x7fb4ceb04640] [1] GoPro Webcam
[AVFoundation indev @ 0x7fb4ceb04640] [2] Chris Borkowski’s iPhone XR Camera
[AVFoundation indev @ 0x7fb4ceb04640] [3] Capture screen 0
[AVFoundation indev @ 0x7fb4ceb04640] [4] Capture screen 1
[AVFoundation indev @ 0x7fb4ceb04640] [5] Capture screen 2
[AVFoundation indev @ 0x7fb4ceb04640] AVFoundation audio devices:
[AVFoundation indev @ 0x7fb4ceb04640] [0] Built-in Microphone
[AVFoundation indev @ 0x7fb4ceb04640] [1] Model 12
[AVFoundation indev @ 0x7fb4ceb04640] [2] Chris Borkowski’s iPhone XR Microphone
[AVFoundation indev @ 0x7fb4ceb04640] [3] Soundflower (64ch)
[AVFoundation indev @ 0x7fb4ceb04640] [4] Microsoft Teams Audio
[AVFoundation indev @ 0x7fb4ceb04640] [5] Soundflower (2ch)
Capture desktop 2 “[4]” and Soundflower 2ch “[4]” audio at 1080p and 29.9 Frames Per Second. MKV is the default format for FFMPEG device capture.
ffmpeg -f avfoundation -r 29.9 -s 1920x1080 -i "4:4" -ar 44100 SCREEN-CAP.mkv
Capture at 1080p 29.9 FPS and convert to MPEG4 with 320k AAC encoding.
ffmpeg -f avfoundation -r 29.9 -s 1920x1080 -i "4:4" -c:v libx264 -preset fast -crf 20 -c:a aac -b:a 320k -vf format=yuv420p -movflags +faststart SCREEN-CAP.mp4
FFMPEG Device Capture (SCREEN CAPTURE in Windows 10/11)
List devices aviable for capture
ffmpeg -list_devices true -f dshow -i dummy -hide_banner
Using DirectShow
ffmpeg -f dshow -i video="screen-capture-recorder" output.mkv
Using GDIGRAB
ffmpeg -f gdigrab -framerate 30 -i desktop output.mkv
Capture a specific region of the desktop
ffmpeg -f gdigrab -framerate 30 -offset_x 10 -offset_y 20 -video_size 640x480 -show_region 1 -i desktop output.mkv
Capture a specific window/application
ffmpeg -f gdigrab -framerate 30 -i title=Calculator output.mkv
Windows 8 introduced a new way of capturing whole desktops: The Desktop Duplication API
FFmpeg implements support for it in the form of the ddagrab filter with hardware encoding.
ffmpeg -init_hw_device d3d11va -filter_complex ddagrab=0 -c:v h264_nvenc -cq:v 20 output.mkv
More Hardware Encoding
You can use hardware acceleration to speed up encoding and reduce the load on your CPU. For example, with NVIDIA hardware encoding:
ffmpeg -f gdigrab -framerate 30 -i desktop -c:v h264_nvenc -qp 0 output.mkv
Lossless Recording
If your CPU is not fast enough, the encoding process might take too long. To speed up the encoding process, you can use lossless encoding and disable advanced encoder options, e.g.:
ffmpeg -video_size 1920x1080 -framerate 30 -f x11grab -i :0.0 -c:v libx264rgb -crf 0 -preset ultrafast -color_range 2 output.mkv
More on FFMPEG device capture
https://trac.ffmpeg.org/wiki/Capture/Desktop